Last updated: April 2, 2026
How to choose the ideal boxing bag for training at home according to your level and space
Installing a boxing bag at home is the first step to taking your training to the next level, but not all bags are the same. Factors such as weight, filling material, and the anchoring system are decisive in avoiding injuries and maximizing the effectiveness of your strikes.
In this guide, you will learn how to choose the ideal boxing bag adapted to your personal goals, whether you are looking to improve your power, work on speed, or simply perform an intense cardiovascular workout. We will analyze the differences between hanging and freestanding bags, as well as the most durable materials on the market.
If you want to transform a corner of your home into a functional training space, here you will find the key criteria for making a smart investment. Discover which type of bag best fits your experience level and the available space in your home.
How to choose the ideal punching bag for home
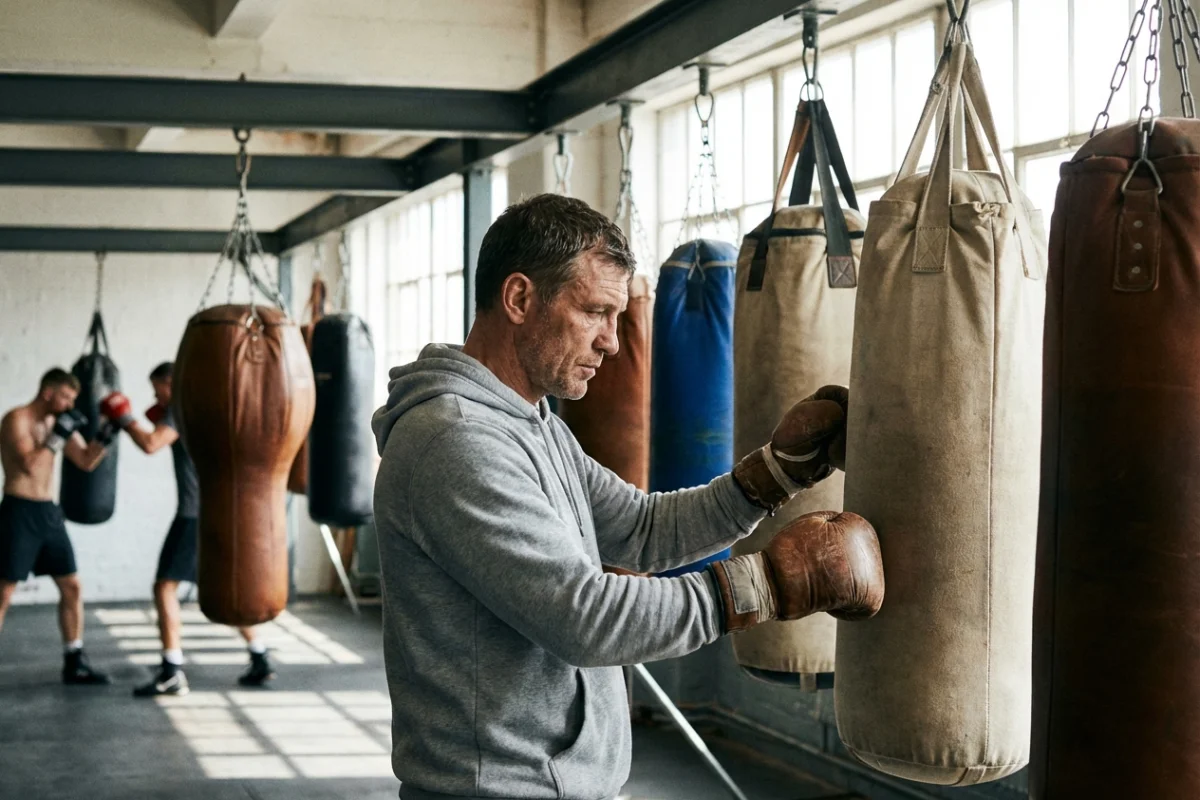
Choosing a punching bag to train at home is one of the best investments to improve your physical condition, technique, and release stress. However, not all bags are the same; the choice depends directly on your experience level, available space, and training goals.
Punching bags are designed to absorb impacts and offer resistance. There are models that hang from the ceiling or wall, and others with their own base that do not require installation. The exterior material, generally synthetic leather, canvas, or leather, and the type of filling will determine the durability and the feeling when hitting.
In addition to technique, having a bag at home offers convenience and schedule flexibility. You can perform intense cardio sessions or perfect your combinations without needing to travel to a gym. It is a versatile tool that, well-chosen, will accompany you through years of constant training.
However, it is vital to consider factors such as the weight of the bag and the solidity of the structure where it will be installed. A bag that is too light will move excessively, while one that is too heavy could cause injuries if you do not have the proper technique. Before buying, evaluate well where you will place it.
In conclusion: the ideal bag is the one that adapts to your strength and the space in your home, allowing you to hit with power and safety to maximize the benefits of each training session.
Advantages of free-standing punching bags
Free-standing punching bags are the perfect solution for those who cannot or do not want to drill holes in the walls or ceiling. They have a heavy base, generally fillable with water or sand, which keeps the bag upright during training.
Their main advantage is mobility. You can place it in the living room to train and store it in a corner or another room when you finish. This makes them ideal for small apartments or rental homes where structural modifications are not allowed.
These bags usually incorporate impact absorption systems using springs or special foams, which reduces sharp rebound and protects the user's joints. They are excellent for working on speed and the precision of hits.
It is important to ensure that the base is heavy enough for your strength level. If you hit very hard and the base does not have enough ballast, the bag could move or tip over during the most intense combinations.
In summary, free-standing bags offer unmatched versatility for the home. They are practical, easy to assemble, and allow you to enjoy a complete boxing workout without technical installation complications.
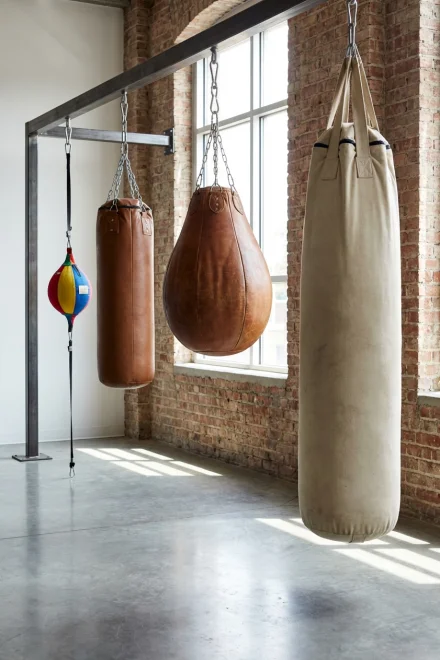
Comparison: Hanging or free-standing bag?
The decision between a hanging bag and a free-standing one usually comes down to two factors: the intensity of your training and the limitations of your home. Both offer a great workout, but their sensations are different.
Regarding the hitting experience, the hanging bag wins for realism. Its natural swing forces you to move and measure distances, better simulating an opponent. The free-standing bag, although it has improved a lot, tends to have a drier and more mechanical rebound.
If we talk about space and logistics, the free-standing bag is the clear winner. It does not require a load-bearing beam or wall supports that could damage the aesthetics of your home. It is the logical choice for those who live in rentals or have plasterboard ceilings.
Regarding power, if you are an experienced or heavy boxer, a hanging bag of at least 30-40 kg is almost essential. Free-standing bags can fall short if your punch is very strong, unless you invest in high-end models with very heavy bases.
In terms of noise, the free-standing bag is usually quieter for neighbors, as the impact is absorbed in the base and does not travel through the walls. However, the hitting itself will always generate sound, regardless of the model.
In conclusion, choose the hanging bag if you are looking for professional performance and have a solid place to install it. Opt for the free-standing bag if you prioritize convenience, mobility, and do not want complications with assembly.
Tips for choosing your punching bag
The ideal weight of the bag should be approximately half of your body weight for a balanced workout.
Make sure you have at least 1.5 to 2 meters of free space around the bag to move safely.
Always use appropriate wraps and gloves; hitting the bag with bare hands can cause serious injuries.
If you choose a hanging bag, verify that the wall is made of solid brick or concrete, never lightweight partitioning.
For free-standing bags, filling the base with sand usually provides more stability than water due to its higher density.
Clean the outside of the bag with a damp cloth after each session to remove sweat and prevent odors.
If you are going to practice Kickboxing or Muay Thai, choose a long bag (banana bag) to be able to work on low kicks.
Place a rubber mat under free-standing bags to muffle noise and prevent them from sliding.
Periodically check the carabiners and chains of hanging bags for signs of wear.
If you are a beginner, start with a bag of medium hardness so that your knuckles and wrists adapt progressively.
Do not hit the bag if the filling has clumped at the base; hit it laterally to redistribute the material.
Avoid leaving the bag in places with extreme humidity or direct sun, as they can crack synthetic materials.
Never hang a heavy bag from an old wooden beam without first consulting a construction professional.
Listen to your body: if you feel pain in your wrists or elbows, review your technique or reduce the intensity of the hitting.
Which bag to choose according to your level and goals
Your previous experience is decisive when buying a bag. A beginner does not need the same resistance as a professional competitor, and choosing poorly can frustrate your progress or cause injuries.
For beginners, medium-weight bags (20-30 kg) or free-standing bags with good cushioning are ideal. The initial goal is to learn the correct technique and toughen the hands without receiving an excessively dry impact that could damage the wrists.
Intermediate users who already train several times a week usually prefer high-resistance synthetic leather hanging bags. These allow working on power and speed combinations, offering a more stable response to constant impact.
For experts or professionals, heavy bags made of genuine leather or high-density technical materials are recommended. These bags barely move with the hitting, allowing you to discharge all your strength and work on muscular endurance intensively.
In short, honestly analyze your current level. It is better to start with something manageable and level up as your technique and strength improve, thus ensuring constant and safe evolution.
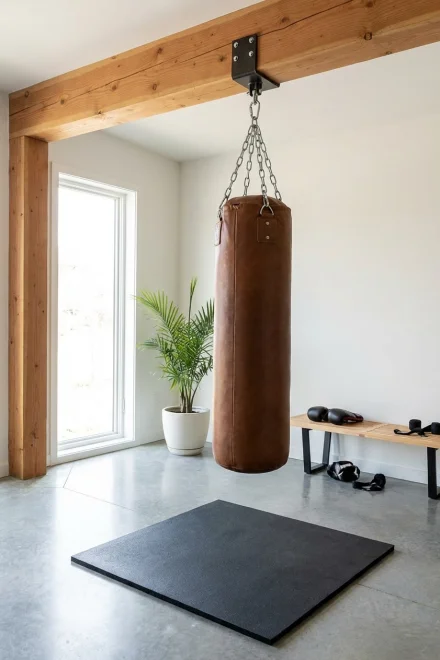
Importance of installation and space
Installation safety is the most critical aspect of having a hanging bag at home. A 40 kg bag hit with force exerts enormous tension on the support, which can multiply its effective weight by three with each impact.
If you are going to install a wall support, make sure to use metal expansion bolts instead of conventional plastic ones. These ensure that the support does not loosen with constant vibrations. If it is on the ceiling, locate a structural concrete beam.
The training space must be clear. You not only need room for the bag, but space to move around it. Hitting a bag placed against a wall limits your technique and can cause you to hit the wall accidentally, leading to injuries.
Also consider the hanging height. The center of the bag should be at your eye level to practice direct punches correctly. A bag that is too high or low will force you to adopt unnatural postures that will harm your back.
In summary, spend time planning where and how you will place your equipment. A solid installation and a well-utilized space are the foundation of a safe and motivating workout in the comfort of your home.
Responsible use and maintenance
For your punching bag to last many years, it is essential to follow some basic maintenance and safety guidelines. Neglecting the equipment not only shortens its useful life but can also compromise your safety.
Always check the condition of the seams. If you notice that the filling is starting to come out or that the skin is cracking, it is time to repair or replace the bag. A bag with shifted filling can have extremely hard areas that injure your hands.
The use of specific bag gloves is highly recommended. Unlike sparring gloves, these are more compact and are designed to withstand constant friction against the bag material without deforming quickly.
If the bag is leather, occasionally apply a leather conditioner to keep it flexible. For synthetic material ones, it is enough to avoid aggressive chemicals during cleaning; a little neutral soap and water is sufficient.
In short, treating your equipment with respect ensures that it is always ready for action. Regular minimal maintenance will save you money in the long run and keep your training sessions at the highest level.
Conclusion: Which is the best bag for you?
There is no single ideal punching bag, but rather the one most suitable for your personal circumstances. Both hanging and free-standing models offer exceptional benefits for health and combat technique.
If you have a fixed location and are looking for the experience closest to the gym, the heavy hanging bag is your best option. If you need flexibility and an installation without construction work, the free-standing bag will more than meet your expectations.
The most important thing is to take the step and start training. With the right equipment and consistency, you will see how your power, coordination, and general well-being improve week after week.
Frequently asked questions about how to choose the ideal boxing bag
How much should my boxing bag weigh?
As a general rule, the bag should weigh approximately half of your body weight. If you weigh 80 kg, a 40 kg bag is ideal for providing the necessary resistance without being too rigid or swinging excessively.
Which material is better: natural or synthetic leather?
Natural leather is the most durable and offers the best feel, but it is more expensive. High-quality synthetic leather (PU) is an excellent option for home use, as it is resistant, easy to clean, and more affordable.
What is the best filling for a boxing bag?
Shredded fabric or pressed textile filling is the most recommended, as it absorbs impact well and maintains its shape. Avoid bags filled exclusively with sand, as it settles at the bottom and can become hard as stone, increasing the risk of injury.
Which is better: a hanging bag or a freestanding one?
The hanging bag is superior for working on footwork and power, but it requires a fixed installation. The freestanding bag is ideal if you cannot drill into the ceiling or walls and need mobility, although it usually has a different rebound.
At what height should I place the boxing bag?
The top of the bag should be aligned with the crown of your head. This ensures that the main impact area is at the height of your face and chest, allowing you to practice straight punches and hooks realistically.
What gloves should I use for training with the bag?
It is recommended to use specific bag gloves or training gloves with good padding. Never hit the bag with bare hands or thin competition gloves, as you could damage your knuckles and wrists.
How can I reduce the noise of the bag at home?
To minimize vibrations, use a shock-absorbing spring between the mount and the bag chain. You can also opt for wall mounts with insulating rubber or use freestanding bags with bases filled with water or sand on a rubber mat.
What is a 'pear' or 'teardrop' type bag?
The teardrop bag has a rounded shape at the bottom. It is excellent for practicing knee strikes, clinching, and uppercuts, being very popular in disciplines such as Muay Thai and technical boxing.
How to keep the bag in good condition for longer?
Wipe off sweat after each session with a damp cloth and mild soap. If it is made of leather, apply leather conditioner occasionally to prevent cracking. Periodically check the carabiners and chains for wear.
Do I need a lot of space to install a bag?
You need a radius of at least 1.5 to 2 free meters around the bag. This will allow you to move 360 degrees, practice footwork, and avoid hitting walls or furniture during the equipment's swing.